Installing tile over existing vinyl Flooring is an enticing option for many homeowners. It’s a strategy that promises significant savings in time, money, and environmental impact, reducing the amount of construction waste sent to landfills. However, successful tile installation over vinyl requires understanding a few key factors and conditions that need to be met. This comprehensive guide will outline when and how you can effectively install tile over vinyl, ensuring a robust and aesthetically pleasing upgrade to your home.
When It's Okay To Tile Over Vinyl
Before installing tile over existing vinyl flooring, consider the following things:
Vinyl Condition
Before you consider tiling over vinyl, it is crucial to assess the current state of the vinyl flooring. Key considerations include:
- Well-Bonded to Subfloor: The vinyl should be securely attached to the subfloor. If the vinyl is loose, peeling, or lifting, it will not provide a stable base for the tile.
- Smooth Surface: Vinyl floors with significant texturing may require additional preparation to create a level surface for tiling. A smooth base is essential to avoid uneven tile installation.
Not Cushioned or Padded: It’s important to note that not all vinyl flooring types are suitable for tiling over. Vinyl that is cushioned or has a foam backing, such as many luxury vinyl planks, will not support the weight and adherence of tile properly.
Subfloor Condition
The integrity and condition of the subfloor also play a crucial role in the success of this project. Consider the following:
- Solid and Stable: A concrete slab subfloor in good condition is ideal. It should be free of any significant cracks or instability. If the subfloor is wood, ensure that it is not warped or rotted and that it has no significant flex, which could cause tiles to crack.
Preparing Vinyl Flooring for Tile Installation
Proper preparation of the vinyl flooring is essential for a successful tile installation. This involves several key steps:
Thorough Cleaning: First, the vinyl flooring must be thoroughly cleaned. Remove all dirt, grease, and wax from the surface. This ensures that the thinset mortar will adhere properly to the vinyl.
Roughing Up the Surface: If the vinyl is too smooth, it might not allow the thinset mortar to bond correctly. To remedy this, you can sand the vinyl surface or use a chemical etching product. This process creates a better texture for bonding.
Choosing the Right Materials
Choosing the correct materials is crucial for ensuring that the tile adheres properly to the vinyl and remains durable over time. It also help you later on if you want to Install wood flooring over tile:
- Thinset Mortar: Opt for a high-quality latex-modified thinset that is specifically designed for use over vinyl substrates. This type of thinset provides a stronger bond and is more flexible, which is ideal for less-than-ideal subfloor conditions.
- Grout: Select a grout that is appropriate for the width of your tile joints. Ensure that it matches the color and finish of your tiles to achieve a cohesive look.
Installation Process: Tile Over Vinyl Flooring
Installing tile over vinyl flooring can be an effective way to refresh your space without the need for extensive preparations associated with removing the old flooring. However, the success of such installations heavily depends on the proper execution of each step. Here's a detailed breakdown of the process to ensure a durable and aesthetically pleasing outcome:
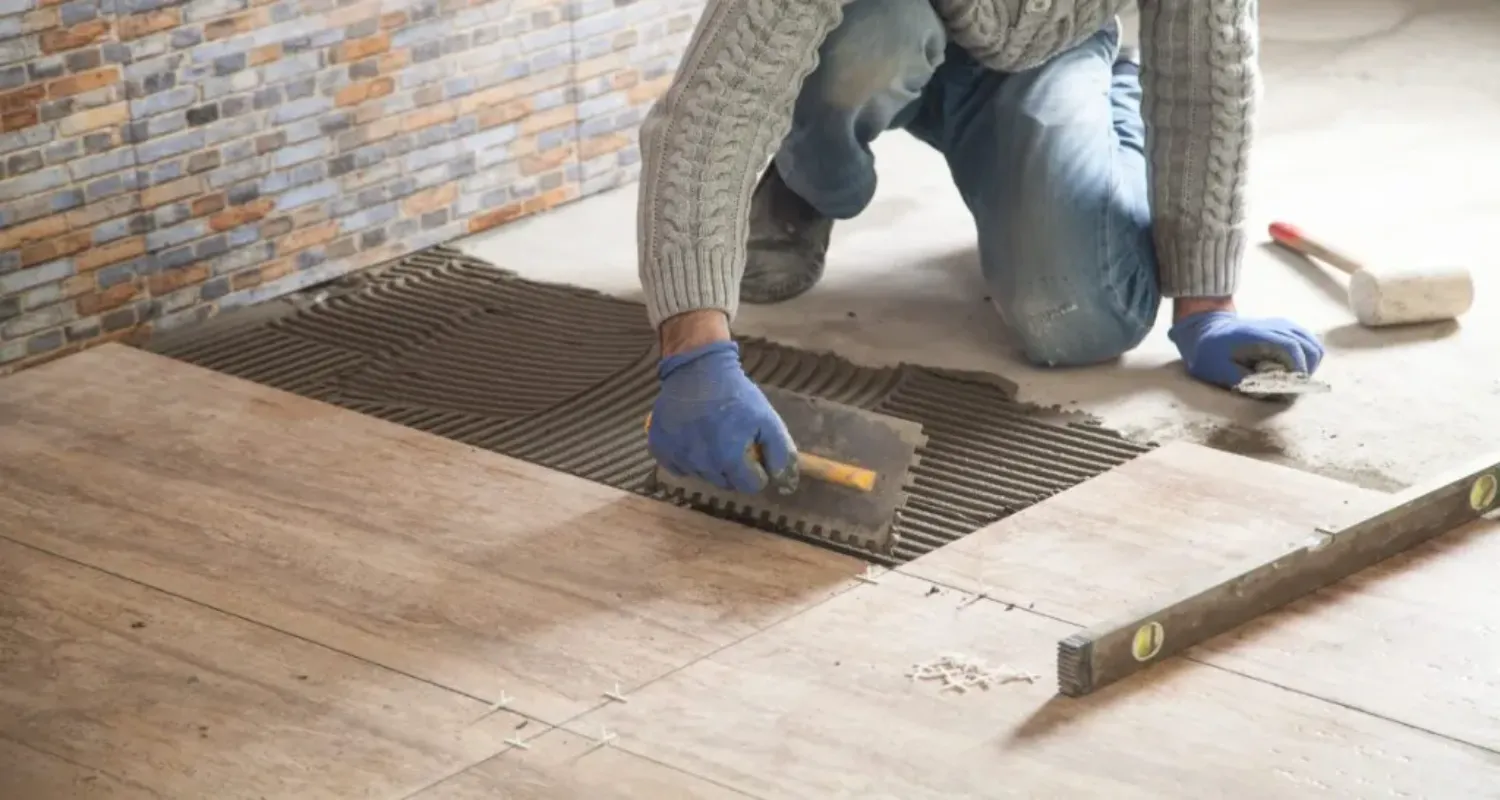
Step 1: Apply Thinset Mortar
The first crucial step involves the application of a latex-modified thinset mortar. This specific type of mortar is recommended because it offers better adhesion when applied over non-porous surfaces like vinyl. Start by ensuring that your vinyl flooring is clean, dry, and free of any debris or wax. Uneven areas should be smoothed out or filled in to prevent complications after tile installation.
Using a notched trowel, apply the thinset mortar over the vinyl flooring. The notches on the trowel are essential as they create ridges in the mortar, which help in controlling the amount applied and ensure uniform thickness across the surface. Hold the trowel at a 45-degree angle to spread the mortar evenly, ensuring that no spots are missed.
Step 2: Laying the Tiles
Once the mortar is spread, begin placing your tiles carefully on the wet mortar. Press each tile firmly into place to ensure it adheres well to the underlying mortar. Use tile spacers between the tiles to maintain uniform gaps for the grout. This is crucial as it prevents the tiles from shifting and helps maintain a symmetrical tile pattern.
During this process, frequently check the level and alignment of the tiles using a spirit level or laser level. Any adjustments should be made while the mortar is still wet, as making changes after it begins to set can be difficult and may compromise the integrity of the installation.
Step 3: Grouting the Tile Joints
After allowing the thinset mortar to cure fully, which typically takes about 24 to 48 hours, you can move on to grouting. Choose a grout that complements the color of your tiles and is suitable for the type of tile and the width of the joint spaces.
Before applying grout, remove all spacers from between the tiles. Using a rubber float, apply the grout diagonally across the tile joints to press it deeply into the spaces. Ensure that all joints are filled completely without any air pockets or gaps.
As you work, use a damp sponge to wipe away any excess grout from the surface of the tiles. It’s important to clean the residue quickly before it dries, as dried grout is difficult to remove and can leave a haze on the tiles. After the grout has set slightly, you can use a soft cloth to buff the tiles and bring out their shine.
Following these steps will result in a beautifully tiled surface over your existing vinyl flooring, transforming the look of your space with a durable and attractive new floor.
Considerations and Limitations
There are several important considerations and potential limitations to keep in mind when tiling over vinyl:
- Floor Height: Adding a layer of tile over vinyl will increase the height of your floor, which may affect door thresholds and transitions to other types of flooring. This may require adjusting doors or adding transition strips.
- Deflection: The subfloor must be capable of supporting the additional weight of the tile. If the subfloor has too much deflection, it could lead to tile cracking or loosening over time.
- Asbestos Concerns: If your home was built before the 1980s and the vinyl flooring is original, it could contain asbestos. Disturbing asbestos-containing materials can be hazardous to your health. In such cases, it is safer to hire professionals to remove the vinyl or choose an alternative method.
For more information, you can read The Essential Guide To Home Maintenance.
Alternatives to Tiling Over Vinyl
Installing Tile Flooring is one of the affordable home remodeling solutions. If tiling directly over vinyl is not suitable, consider these alternatives:
- Vinyl Removal: Removing the existing vinyl and preparing the subfloor can provide a more stable and suitable base for tile installation.
- Installing Laminate or Engineered Wood Flooring: These materials may be installed over vinyl if the vinyl is in good condition and the subfloor is stable. They provide a different aesthetic and might be preferable depending on your design goals.
Looking Out For ReliableTile Installation Services?
Tiling over vinyl flooring can be a practical and cost-effective way to upgrade your floors without a full-scale renovation. However, it requires careful consideration of both the vinyl and subfloor conditions, along with meticulous preparation and the right materials. Proper execution of this project can yield a durable and aesthetically pleasing result that enhances the value and enjoyment of your home. If you want to Install tile over vinyl flooring, consider our Flooring Installation services, at APRKC home renovation. Happy flooring!
Ready to Talk Through Your Project?
Aaron's Painting and Remodeling helps Kansas City area homeowners with painting, remodeling, wood repair, and finish work.